Adding a new station with SMP
In this chapter we prepare metadata for a new seismic station from scratch, using the Station Management Portal (SMP) at https://seismo.gempa.de/smp/login/?next=/smp/ [a product of gempa GmbH, a German software company and GEOFON partner]. We then configure this in an existing SeisComP system.
To add you own seismic station you will of course need a seismic station streaming real-time data and reachable from the SeisComP3 acquisition machine. You will also require the following:
- Internet connection to reach the SMP portal and a valid e-mail address to create an account
- Technical knowledge of your seismic station (sensor and datalogger type, sampling rates, gains, real-time protocol in use and IP on the network)
- Coordinates of your station, name of the station, station/network/channel codes
- Start date (eventually also end date)
- Restrictions
Preparatory work
Ensure you can reach your station from your SeisComP3 machine: try to ping the station IP address ...
If you know your station has a Seedlink server you can also run the following command to check if the server has data available for you:
slinktool -Q {IP address}:18000
- Description of the demo station in use in this particular exercise.
The station used here is a very simple demo station. It has all the components of a real seismic station but of course cannot be compared from the performance point of view to a real seismic station. In particular we will be using a demo kit composed of
- Raspberry Pi 3 ($40)
- Educational USB digitizer ($40)
- 4.5 Hz passive seismometer, only one component ($80)
- SeisComP3 software installed on the raspberry Pi (free!)
- USB power supply ($10)
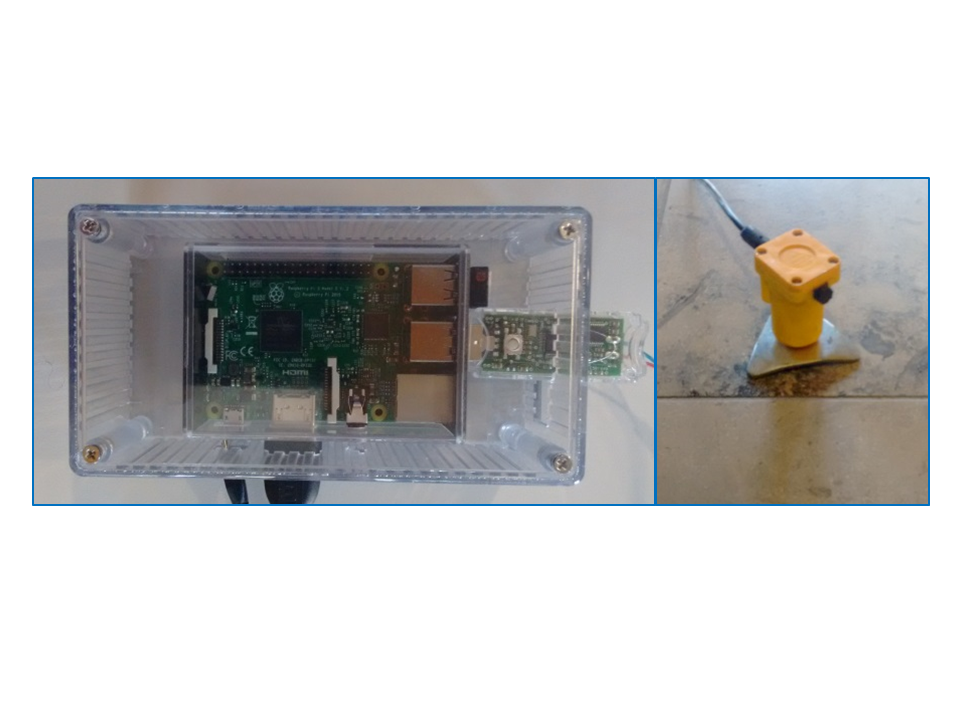
A Raspberry Pi 3 (left) and a single component passive seismometer (right).
Create the SC3 inventory.xml with SMP
- Go to the SMP system at https://seismo.gempa.de/smp/login/?next=/smp/
- Sign up for a new account providing a valid e-mail address to receive the activation message
- Follow the demo done by the presenter until you are able to export the SC3 inventory.xml file
- If you do not manage to create your own SC3 inventory.xml, download the file from the following link: http://geofon.gfz-potsdam.de/training/inventory/inventory_GE_TST1.xml
Import the inventory.xml file in your SeisComP3 system
- Open scconfig by invoking the scconfig command on a terminal.
- Go to the inventory tab by clicking on the icon on the left side.
- Import your inventory.xml file by clicking on the “import” button. Select “sc3” as format and click on Source to provide the path to the inventory.xml file.
- Click on the Sync keys button.
- Move to the Bindings tab by clicking on icon on the left side.
- Your network and station should appear in the top left panel.
- Create the bindings for the station as done already in Chapter 3 for the GE network.
- For your station you will need to create a new seedlink profile and binding for the source (from where you acquire the data and select the appropriate plugin if you do not use slink as acquisition protocol). More about Seedlink, acquisition binding/plugins here: http://www.seiscomp3.org/doc/jakarta/current/apps/seedlink.html#bindings
- For this particular demo station seedlink can be used for the acquisition. Therefore you only need to add the IP of the server on the station in the chain_plugin, by clicking on the green + button.
- As this demo station is streaming SH? streams you should be sure to have a global profile with “detecStream = SH” associated with this station.
- Ctrl+S to save.
- Go to the System tab by clicking on the icon on the left side.
- Press Esc to de-select all modules and press “Update Config”.
Open SeisComP trace view (scrttv) or map view (scmv) and if you see your stream acquired then you have successfully configured your station.